Midland WR120-EZ weather radio setup

Living in an area prone to severe weather 6 months out of the year (and the occasional blast of winter), a weather radio or two (or three, or four) good things to have around the house.

We have a few of the Midland WR120-EZ weather radios scattered around the house so that we get alerted wherever we are in the house.

Midland WR120 weather radio (image from https://midlandusa.com/product/wr-120-weather-radio/)

They’re not too expensive, they’re easy to program, and they don’t take up much space.  We’ve given a couple of ours to neighbours, and regularly give them to friends as gifts or housewarming presents.  They run off AC power with 3 AA batteries providing backup power for when power goes out or for portable use.  The radio has a comprehensive list of alerts, most of which can be turned on or off.  It also has SAME (Specific Area Message Encoding) codes and 7 NOAA weather radio station frequencies to select from.  You can set the radio to get alerts for a single county, multiple counties, or all weather alerts.

The back of the radio has ports for an external antenna, power plug, and a cloning port (the manual has no information on how to use the cloning port).  I find the built-in telescoping antenna sufficient to receive the two NOAA stations in my area.  The antenna is also pretty easy to replace if you happen to accidentally break it.  The telescoping antenna from Radio Shack is a perfect fit if you ever need to replace the original antenna.

Midland WR120 rear (image from https://midlandusa.com/product/wr-120-weather-radio/)

When an alert is received, the WR120 produces a pretty loud alarm sound.  In your average sized house, you should have no problem hearing the alarm regardless of where you are in the house.  If you live in a big house and really want to make sure a weather alert can be heard anywhere in the house, you might want two or three radios.

It’s unboxed.  Now what?

First thing you’ll want to do once you get the radio powered up is start programming it.  Plug the wall wart into the wall and the other end into the radio.  Add batteries.

The instructions in the manual are pretty easy to follow.  Press the MENU button to get into the menu.  The UP and DOWN buttons will cycle through the menu options, and the SELECT button will select that menu option.  If you get lost, press the MENU button a few times until the display says SAVING, and that will get you back to normal operation.  Then you can start over.

Setting the time

Easier than setting the time on a VCR.

  • Press the MENU button to get into the menu.  You should see SET TIME on the display, but if not just hit the UP or DOWN arrow buttons until you do.
  • Press the SELECT button.
  • Set the current time by using the UP/DOWN buttons to set each digit, and the LEFT/RIGHT buttons to move between the digits.
  • Press the SELECT button when you’re done to store the time.

Turn the beeps off

If you’re like me you’ll find the beeps the weather radio makes with each button press annoying, so let’s turn that off. 

  • If you’re still in the menu, press the UP/DOWN buttons until you get to BUTTON BEEPS.  If not, press the MENU button and then the UP/DOWN buttons to get to BUTTON BEEPS. 
  • Press the SELECT button, then press the UP or DOWN button until OFF is displayed. 
  • Press the SELECT button to save the setting

Set your location(s)

You can tell the WR120 to give you alerts for just the county you’re in, multiple counties, or all alerts.

  • If you’re not already in the menu, press the MENU button.
  • Press the UP/DOWN buttons until you get to the SET LOCATION menu.  Press the SELECT button.
  • Use the UP/DOWN buttons to select SINGLE, MULTIPLE, or ALL depending on how many places you want to get alerts from.  Press the SELECT button when you get to your choice.
  • If you know the SAME code for the county/counties you’re interested in, press the RIGHT button (if you don’t, look them up at the NOAA Weather Radio site).  Use the UP/DOWN buttons to change each digit, and the LEFT/RIGHT buttons to move between the digits to set the SAME code.
  • Alternatively, press the SELECT button to select your location by going through the list of locations starting with the country (USA/CANADA), state/province, and then county.  Use the UP/DOWN buttons to scroll through the list, and the SELECT button to make your choice at each level.
  • When you’re done, press the MENU button to save the settings.

Configure the alerts

Once you have the time and SAME location set, the next thing you’ll want to do is set up the alerts.  Midland provides a useful alert reference chart showing the default setting for each alert and what alerts can’t be changed.  The ones that can’t be changed don’t show up on the list in the radio.  Since I don’t need to know about most of the alerts that default to ON (pretty low probability of icebergs here I think), I set them all off, then turn on individual alerts.  The alerts I’m most interested in are for tornadoes and hurricanes.  Hurricane and tornado warnings are always on, so I also turn on hurricane and tornado watches.  Warnings > Watches.

  • Press MENU.  Use the UP or DOWN arrow key to scroll through the menu until you get to SET EVENTS.  Press the SELECT button.
  • Use the UP or DOWN arrow key to scroll through the events until you get to ALL OFF.  Press the SELECT button.  You’ll end up back at the SELECT EVENTS menu.
  • Press the SELECT button again and scroll through the menu until you get to EDIT EVENTS.
  • Scroll through the list of events until you get to one that you want to enable.  If the alert name is too long for the display, the rest of it will start scrolling across.  Lights below the display indicate if the alert is an advisory, a warning, or a watch.  Press the SELECT button, use the UP or DOWN arrow key to set the alert to ON, then press the SELECT button.  This will take you back to the list of events.  Repeat for each alert you want to enable.
  • When you’re finished, press the MENU button.  SAVING should appear on the display to indicate that the settings are being saved.

Set the weather station

Now you’ll want to tell the weather radio which NOAA weather radio station to listen to.  Make sure the antenna is fully extended.  Sometimes it’s helpful to do this outside to make sure you’re getting good reception.

  • If you’re not already in the menu, press the MENU button.
  • Press the UP/DOWN buttons until you get to SET CHANNEL.  Press the SELECT button.
  • Press the UP or DOWN buttons to cycle through the list of 7 VHF frequencies until you hear a NOAA weather radio station.  There might be more than one in your area, so select the one you get the best reception for.
  • Press the MENU button to save the setting.

Now your WR120 radio is ready to go to work.  Find a good spot on the counter or a shelf somewhere, plug it in, and wait for it to warn you about incoming severe weather.  Press the big WEATHER/SNOOZE button whenever you want to listen to the NOAA weather radio broadcasts.

You’ll want to check on your radio every now and then.  If it’s in weather radio mode, you’ll see a flashing NOAA on the display.  If you see an icon that looks like a power plug or an RCA plug, that means the weather radio is only operating on AC power.  If you put batteries into the radio, they’ll probably need to be replaced.

Review: Celestron EclipSmart Travel scope

I came across the Celestron EclipSmart Travel Scope while browsing around B&H Photo looking for more things to lust after. For $100 I was intrigued, so I decided to pick one up along with some adapters to let me attach my camera to the scope.

I’ll admit it. The main reason I picked up this little budget scope was for the 2017 eclipse. The other reason is that while I’ve been fascinated by astronomy and astrophysics my entire life, I’ve never had what I would consider a real telescope of my own. I’ve had chances to use them and look through some pretty decent ones (8″ and 12″ reflectors on top of the U of A Physics building). When I saw the EclipSmart, I thought to myself that maybe I should change that. Even though this one is only for solar viewing, I figured it would be a decent place to start. Fortunately, I’m pretty good at managing my expectations (at least I think I am).

First impression when I saw the box was that was a lot smaller  than I expected. Everything comes packaged in a 45x28x13 cm box. The Celestron EclipSmart travel scope is a 50 mm refractor telescope with a 360 mm/f7.4 focal length. Comes with a 20 mm eye piece, tripod and a backpack to carry everything around in. It’s all light enough to be easily portable, and sets up pretty quickly.

Celestron EclipSmart
Celestron EclipSmart Travel Scope

The telescope is about the size of a large spotting scope. The solar filter is permanently installed, so it’s a bit of a uni-tasker as far as telescopes go.

The telescope will attach to any tripod using a standard 1/4″ threaded screw. The tripod that comes with the scope is lightweight with three extendable sections on each leg. A little bit on the flimsy side, but it does the job. Easily knocked over, so not something you want to set up where lots of people are running around. Fully extended, the tripod stands just a little over 1 m high which puts the eye piece of the telescope at a reasonably comfortable height for viewing (unless you’re really tall).

On the tripod. Banana for scale
On the tripod
On the tripod

Handy aiming sight lets you get the telescope pointed at the sun without having to look at the sun or try to hunt for it through the scope.

Sun alignment
Sun alignment (dog not for scale)

So far, it seems like a decent little scope for the price. Lightweight, very portable and easy to carry around. Focusing is easy and fairly smooth. With the 20 mm eye piece, the image of the sun is a pretty decent size. Doesn’t fill the entire field of view of the eye piece, but the image of the sun is large enough to see sunspots.

If you’re looking for a simple, inexpensive scope for solar or eclipse viewing, this one fits the bill nicely.

Photos to come in a later post.

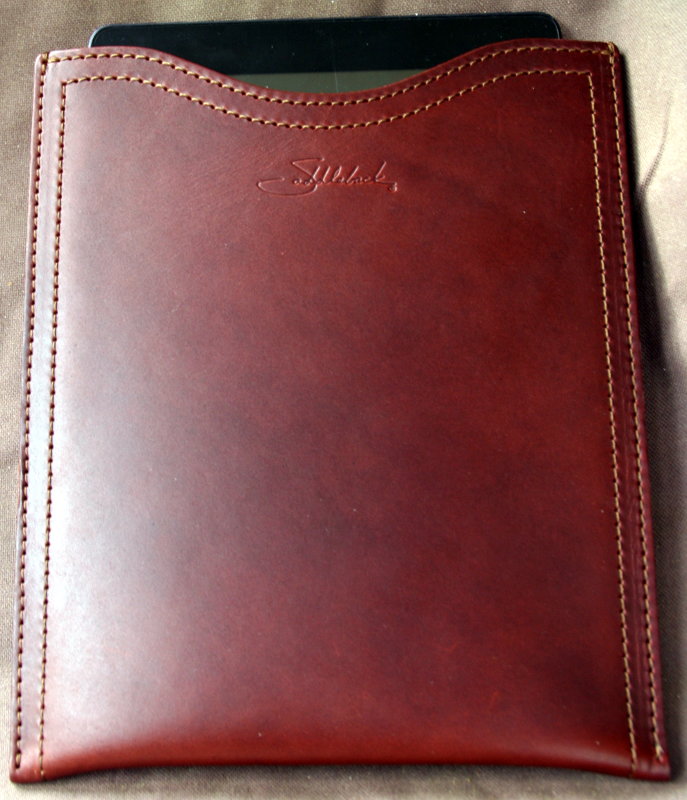
Sleeve case for Transformer Prime

Rather than get one of those flip cover style cases for my Transformer Prime (it still needs a name), I opted to get a sleeve type case.

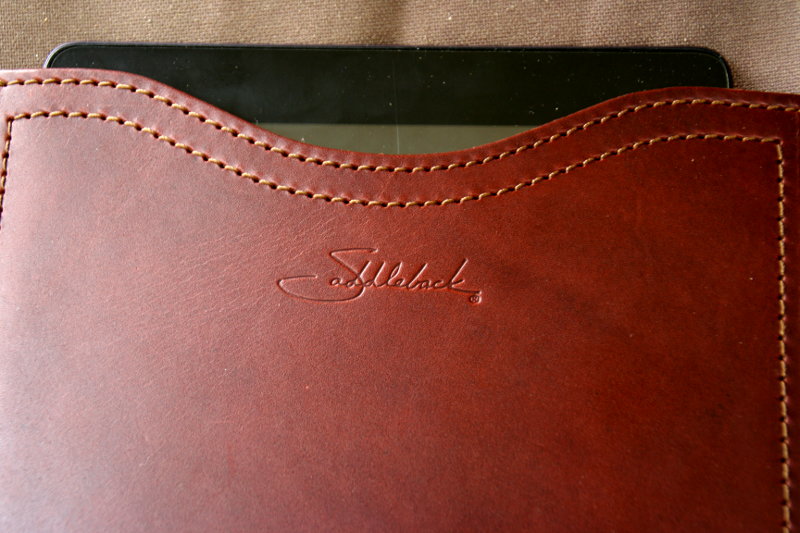
I don’t remember how I discovered Saddleback Leather Company on the internets, but they sell some really nice leather items, including a wallet I picked up from them a couple years ago. Their Classic Briefcase has been on my IWantINeed list for a while now.

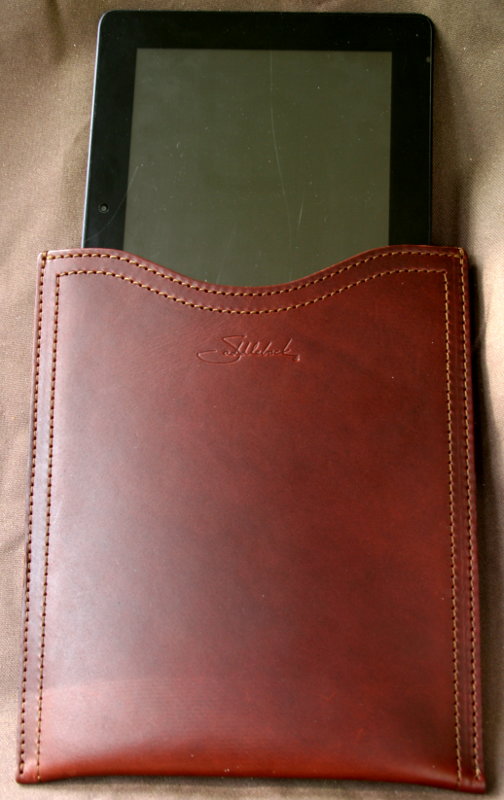
When it came to sleeve cases, Saddleback Leather was the first place I went looking and was delighted to find their Gadget sleeve. I had to wait a bit for the colour I wanted to be in stock though.

Although the sleeve is sized more for an iPad sized tablet (the Prime sticks out some), the Prime still fits in there pretty nicely with some additional room to spare. A Prime with keyboard dock would probably go in there perfectly.

For now, the case holds the Prime in pretty securely so there’s not too much danger of it slipping out accidentally. Even with some light shaking the Prime stays in the sleeve. That may change as the sleeve gets broken in over the next year.

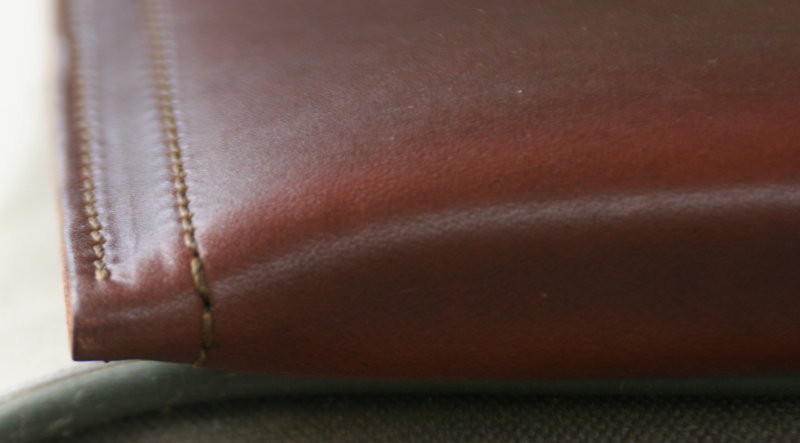
The stitching is pretty solid, and if it’s anything like their wallet, will take a lot of abuse before it starts showing any sign of wear. The leather is 2 mm thick, and the inside is lined with pigskin (I think). It should provide a good bit of protection against falls, unless it happens to fall on the open end, in which case you’d be pretty much hosed.

This sleeve case is likely to outlive every gadget I’ll ever own.

Transformer Prime as a reader

The main reason for getting the Transformer Prime was so that I could read my ever growing collection of PDF journal articles and ebooks some place other than the in front of my computer. Places like my rocking chair on my back porch or the comfort of my couch or bed. You know, the comfy places.

First off, glassy screen -> reflections. This shouldn’t come as a surprise to anyone. Particularly glaring reflections can, for the most part, be dealt with by angling the screen without affecting readability too much. If this is something that’s going to drive you crazy, you’ll want to consider something else. Hasn’t bothered me too much so far.

The brightness of the Prime means that the tablet should be readable in pretty much any lighting condition, from dark room the bright daylight. The brightness boost provided by IPS+ mode makes the screen on the Prime easily readable even in bright sunlight, although you’ll pay for it in battery life. I haven’t used it much for reading in sunlight too much, but it works.

The weight isn’t much more than a hefty book, but heavier than your typical paperback. Holding it for extended periods of reading isn’t too great a strain and so far I haven’t found it terribly uncomfortable. I find for reading, holding the Prime in portrait orientation is most comfortable.

Perhaps the biggest problem I’m having with the Prime as a reader is that it’s too easy to bounce around and do other things like surf the web, check mail when a new message notification pops up or check Facebook, or play a game. If you have a brain with somewhat ADD tendencies like mine, this can be a bit of a problem, especially if you’re reading something that isn’t quite engrossing enough to override those tendencies. With dedicated e-book readers like the Kindle or Nook, all you can do is, well, read so there isn’t the temptation to bounce around to or get distracted by other things. If your brain isn’t like that, then probably won’t be an issue.

All in all, I’m liking the Prime for reading. I think it will rank up there as one of the better purchases I’ve made.

Review: Heaven by Mur Lafferty

My first encounter with Mur Lafferty was at CREATESouth 2010, where she gave a very entertaining keynote speech.

The last few days I’ve been entertaining myself with her audio book series Heaven. The Afterlife Series started off in 2006 with Heaven and continues with Hell, Earth, Wasteland and concludes with War.

For me, the measure of a good book is how often my brain churns around in the world and with the characters. Books like Dune, Lord of the Rings, most anything by Robert Heinlein have all given my brain vast worlds to explore and have fun in.

Although I’ve only recently finished Mur Lafferty’s Afterlife series, it has been spinning in my head since I started listening. It’s a story that takes many different elements and combines them all together into an entertaining tale. Take two people, kill them, send them into the afterlife, turn them into gods that never quite grasp the full extent of their god-ness and see what happens.

When I’m listening to things, whether it’s music, podcasts, audiobooks or the radio, my brain usually ends up tuning it out. Heaven managed to keep my brain entertained enough to keep listening. Mur does a good job of reading the story, and most of the time it’s easy to tell the different characters apart. There is the occasional sprinkling of swear words in there, so probably not something you’d want to listen to with kids around.

The entire series is available from Podiobooks.com and is just under 18.5 hours (69 files, ~850 MB). Definitely worth checking out.