French Press coffee Mah way

It’s not difficult to find tutorials online for making French press coffee. I’ve tried a few, and settled on this method. It makes a cup that I enjoy black, or with a splash of cream.

My French press comes from IKEA, a 16 oz press (or a 32 oz press, depending on how caffeinated I want/need to be). You can find fancier ones out there, but these were reasonably inexpensive and do a perfectly good job.

Small (16 oz) on the left and Biggie (32 oz) on the right
New 16 oz Clemson alumni mug for scale.

I like to use an electric kettle to cook my water. Cooks the water quickly, pours nicely, and the one we have holds just enough water to fill the big press. Get one with an automatic shut off feature.

Electric kettle for cooking the water.

Most French press recipes call for very coarsely ground coffee and long brewing times. Since I don’t want to deal with having to adjust my grinder whenever I want to brew with the French press or Aeropress, I go with the same medium-ish grind that I use with the Aeropress. The grind size is pretty close to what you’d use for a regular drip coffee machine. I’ve found that one very heaping Aeropress scoop (17 grams or about 3 tablespoons) of coffee (double that if I’m using the big press) makes a cup of coffee that I like.

17 grams of ground coffee (about 3 tablespoons)

Dump the coffee into the press and add a tiny dash of salt (something I picked up from a Good Eats episode). I find it helps enhance the coffee flavour but doesn’t make it salty (unless you add too much).

Coffee into the press with a dash of salt.

Add water to about the top of the metal band, give it a bit of a stir, and put the press part on. I like to push the press down a bit so that all the grounds are submerged. Let it sit for about 3 minutes. Set a timer if you like.

After the brewing time, press the grounds all the way to the bottom, and gently pour into your coffee receptacle of choice.

Press the grounds and pour.

The press uses a fine metal mesh to filter out the grounds, but really fine particles will still get through. Towards the end, I slow down the pouring and leave a bit in the press so that I’m not pouring all the fine stuff into my cup. That will help reduce the amount of sludge at the bottom of your cup. If you pour too quickly, the grounds get stirred up and you’ll end up with a bunch of sludge at the bottom of your cup. If you like sludge, then pour however you like.

Enjoy your coffee!
Enjoy your coffee!

Drink straight up, or doctor it up however you like.

Kicking up the coffee grinding

Kicked up my coffee bean grinding yet another notch with my drill press.

Drill press
Drill press

Set the drill press to its slowest speed

Drill press at its lowest speed setting (motor spindle on the right)
Nut driver attached to the drill press
Nut driver attached

You can probably see where this is going.

Ready to grind the coffee beans
Ready to grind

Takes about 40 seconds to grind the entire hopper full of beans.  Tried to get some video, but for some reason my phone only recorded the audio.

Quite effective. The metal spindle and ceramic grinder parts gets pretty hot after grinding though and takes a few minutes to cool down enough to handle.

Trying out Jamaican Blue Mountain Coffee

During the stop at Falmouth, Jamaica on our cruise last month, I picked up a couple pounds of Jamaican Blue Mountain coffee. It has a reputation for being one of the best coffees in the world, and also pretty pricey. At $88.10/kg ($40/lb), it’s probably the most expensive coffee I’ve purchased so far. Not sure how much it would be purchased in the US though. Next time I’m out wandering around, I’ll have to look for some.

A bag of Jamaica Blue Mountain coffee beans

Inside the burlap bag, the coffee beans were encased in a sealed gold foil pouch. The beans themselves don’t look too unusual, and have a nice roasted coffee aroma to them.

Jamaica Blue Mountain coffee beans

Put a few scoops into my grinder (a Hario hand grinder) set to a medium-ish grind.

Ground Jamaica Blue Mountain beans

First thing I noticed was that these beans had quite a bit less chaff than other beans I’ve ground. Nice aroma of freshly ground beans. Into the Aeropress they went.

Ready to brew in the Aeropress

My regular Aeropress method is inverted, add water (just off the boil) to the top, stir, 60-90s brew time, press.

Brewed coffee
Brewed coffee

Normally I press into a mug that has a bit of chocolate milk in it (heated up in the microwave first). For this first brew, I went straight up black, so I just topped off the mug with hot water.

Brewed coffee ready for drinking

I’m far from a coffee snob and my coffee palate isn’t very refined so I can’t offer any tasting notes or anything like that. I can say that I ended up with a very nice, mild and tasty mug of coffee without much of the bitterness or strange after taste I get with some other coffees.

Maybe later I’ll try some taste testing to compare with some other coffees that I usually drink.

Grinding coffee Alton Brown style

Taking a page from the Alton Brown School of Kitchen Gadgetry, I decided to try super charging my coffee mill.

Hand crank coffee grinder
Coffee grinder plus cordless drill

I think you can see where this is going.

Coffee grinder
Grinding coffee with the drill
DSC01864.JPG

Coffee making: Level 2

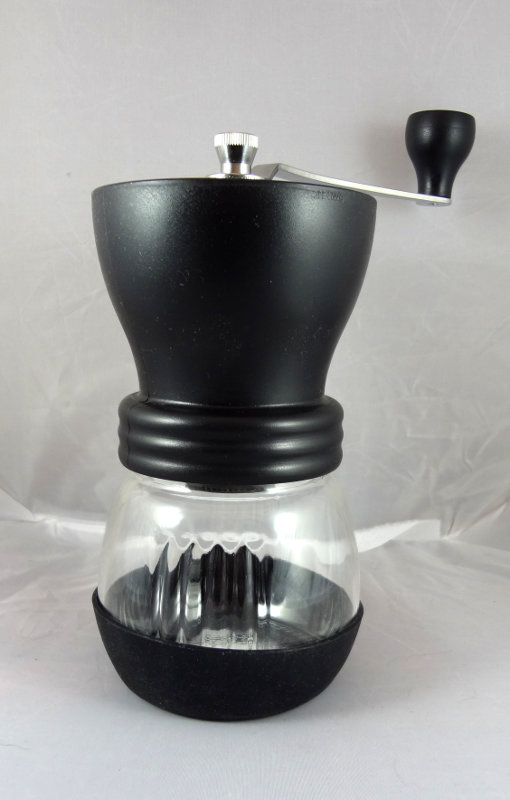
Added a new tool to my collection of coffee-making related implements: a burr grinder. Nothing fancy, it’s like an oversized pepper mill.

Coffee grinder
Coffee grinder

The main reason I wanted to get one of these is so that I can adjust the size of the grounds, which is something I can’t do with the electric blade type grinder I currently have.

Coffee grinder
Coffee grinder
Coffee grinder
Coffee grinder

One nice thing about this one is that the hopper is large enough to hold enough beans for a jar of my cold brew coffee, where with the electric grinder I have to grind the beans in two batches. It takes a little bit longer, but for now it’s kind of fun to do.

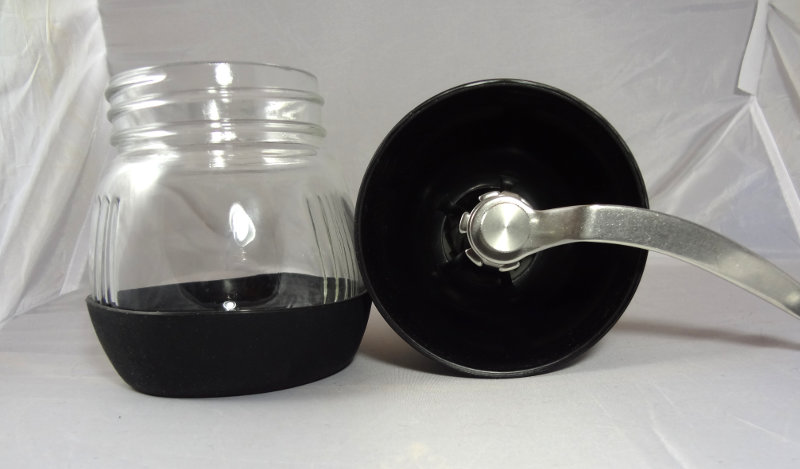
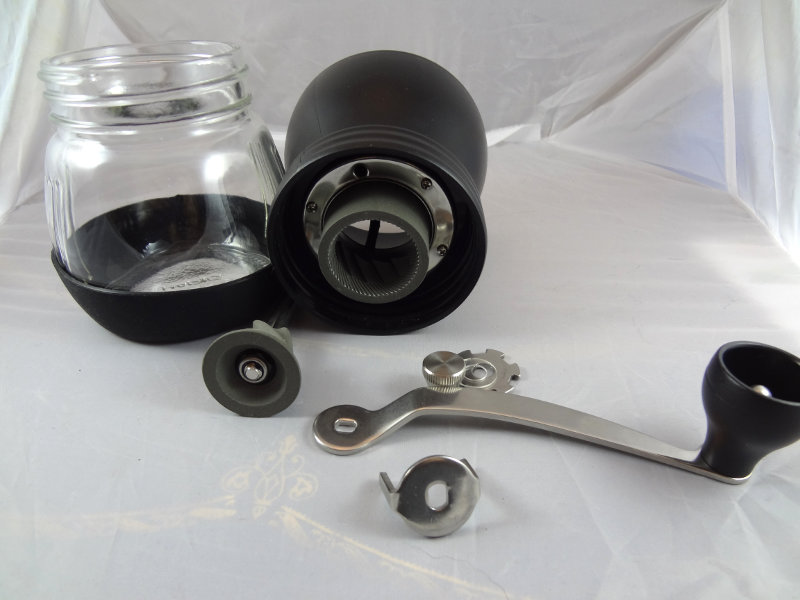
The other nice thing about this manual model is that it’s pretty simple, not a lot of pieces, and comes apart pretty easily for cleaning.

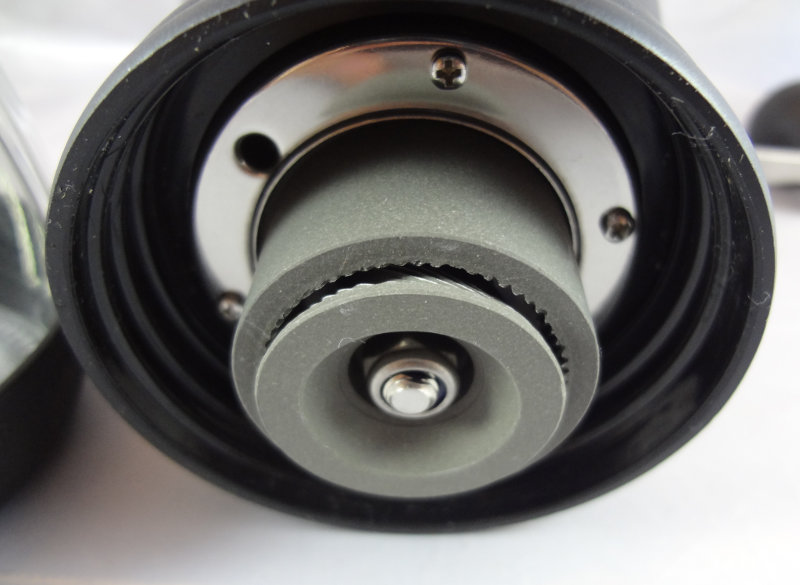
Ceramic burrs
Ceramic burrs
Coffee grinder disassembled

It also comes with a cap to screw onto the jar to store any coffee you’ve just ground, but I probably won’t use it much, if at all.

Looking forward to doing some coffee experiments with this.