Started with my first big Arduino project using one of the Sparkfun Redboards and my new *duino work station.
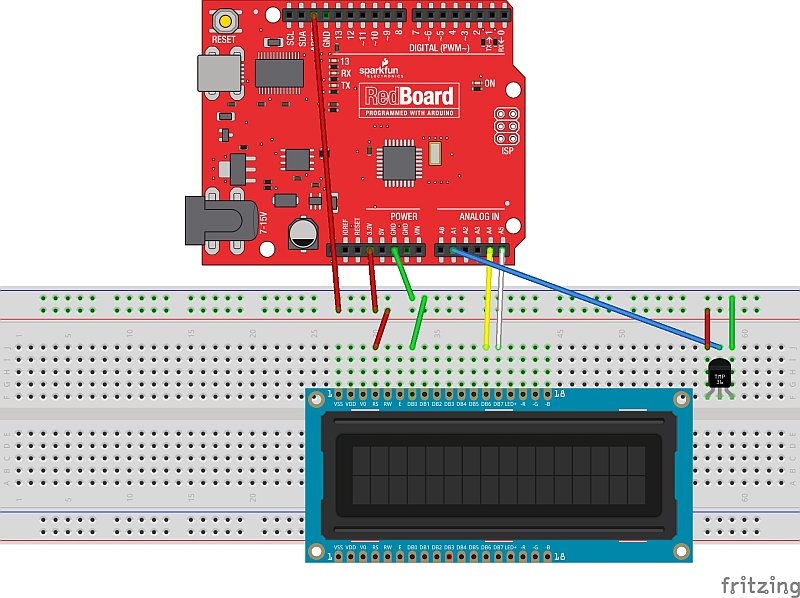
The Adafruit RGB LCD shield and TMP36 temperature sensor were pretty easy to wire up to the Redboard. The LCD shield communicates using the I2C pins, so it just need those to connections plus 5V power and ground from the Redboard. The TMP36 was just as easy to wire using 3.3V power and ground from the Redboard and connection to one of the Redboard analog inputs.

(There was no Fritzing part for the LCD shield, so I just used an LCD display part instead)
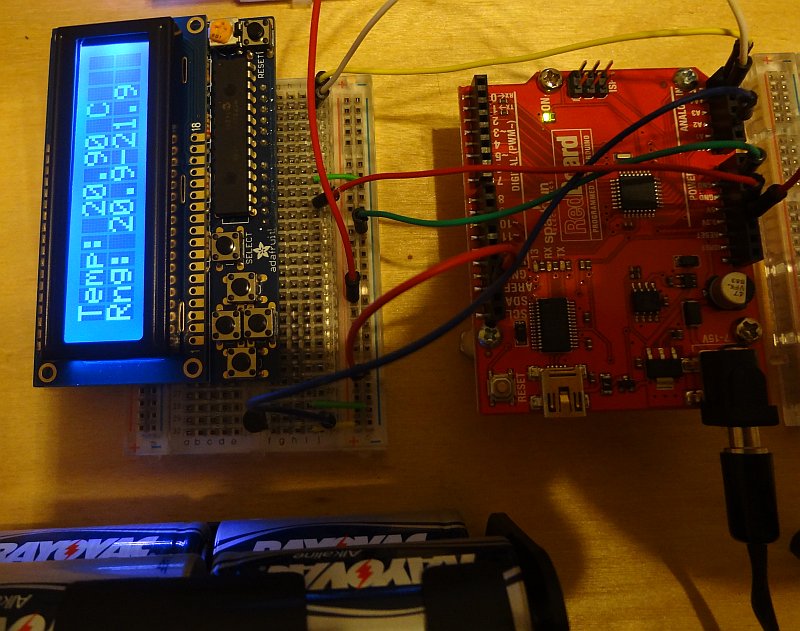
A few hours of writing some code and fiddling around got me a working thermometer.
Thanks to the Adafruit RGB LCD library, the sketch for what I’ve done so far is pretty simple. Pressing the Select button on the shield makes the LCD turn on and display the current temperature as well as the range of temperatures measured since it was turned on. The temperature is displayed for 30 seconds, then the LCD and backlight are turned off. Pressing the Select button again makes it display the temperature again.
The next step will be to add some additional functions accessed via a menu. I’ll add a speaker or buzzer and have it alarm above a certain temperature. Once I have this prototype working nicely, I’ll repackage it and turn it into a thermometer to monitor the temperature in our freezer. I’ll have to figure out how to attach the thermometer to the power and analog pins, because the LCD shield doesn’t break them out. Shouldn’t be too hard to work out.
Discover more from Imablog
Subscribe to get the latest posts sent to your email.
